Notification
You can configure various notifications in your system to remind you of important activities.
- The completion date of a Task.
- Expected Delivery Date of a Sales Order.
- Expected Payment Date.
- A reminder of follow up.
- If an Order greater than a particular value is received or sent.
- Expiry notification for a Contract.
- Completion/Status change of a Task.
To access notification setup, go to:
Home > Settings > Notification
1. Setting Up An Alert
To set up a Notification:
- Select the Document Type you want to watch changes on.
- Define what events you want to watch under Send Alert On. Events are:
- New: When a new document of the selected type is made.
- Save/Submit/Cancel: When a document of the selected type is saved, submitted, or canceled.
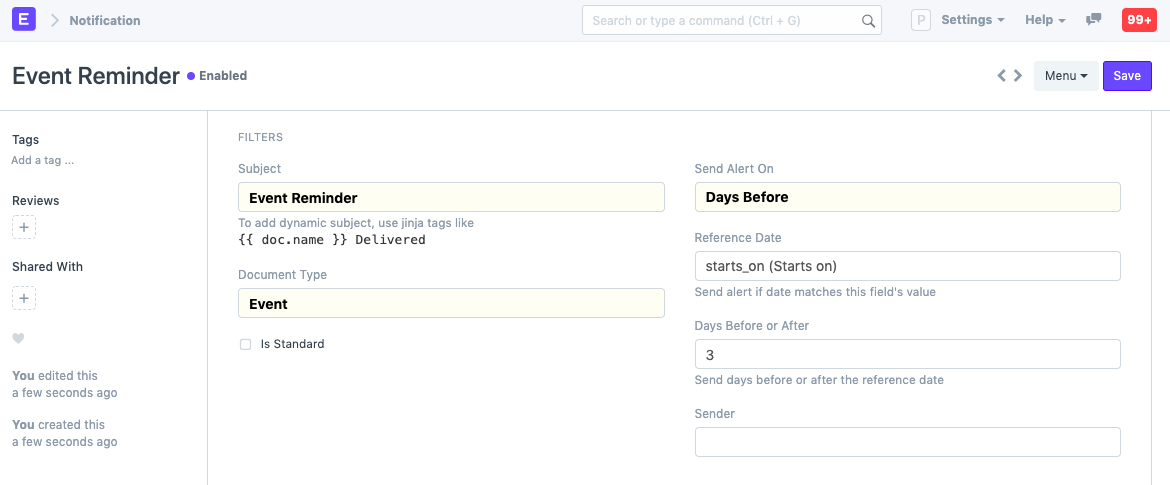
- Days Before/Days After: Trigger this alert a few days before or after the Reference Date. To set the days, set Days Before or After. This can be useful in reminding you of upcoming due dates or reminding you to follow up on certain leads of quotations.
- Value Change: When a particular value in the selected type changes.
- Method: Sends notification when a specific method is triggered. Eg: before_insert.
- Custom: Send a notification to an Email Account selected.
- Set additional Conditions if required.
- Set the recipients of this alert. The recipient could either be a field of the document or a list of fixed Email Addresses.
- Compose the message.
- Save.
1.1 Setting a Subject
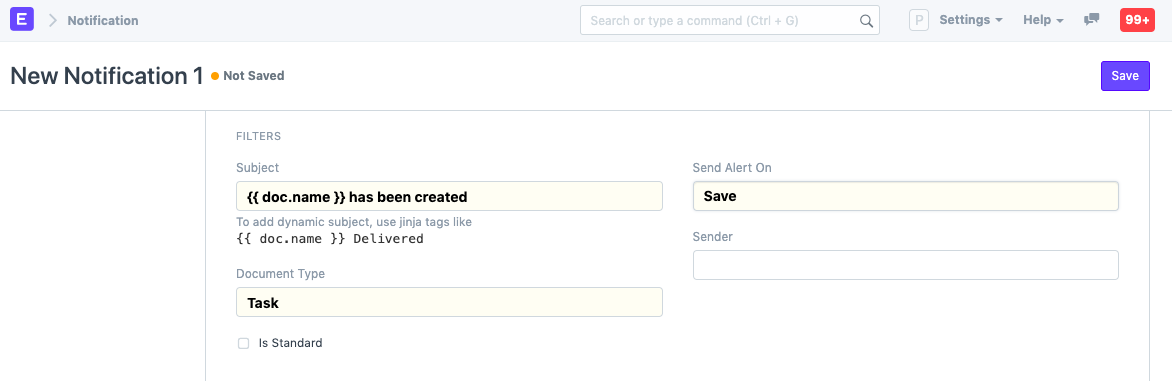
You can retrieve the data for a particular field by using doc.[field_name]. To use it in your subject/message, you have to surround it with {{ }}. These are called Jinja tags. For example, to get the name of a document, you use {{ doc.name }}. The following example sends an email on saving a Task with the Subject, "TASK#### has been created"
1.2 Setting Conditions
Notifications allow you to set conditions according to the field data in your documents. For example, if you want to receive an Email if a Lead has been saved as "Interested" as it's status, you put doc.status == "Interested" in the conditions textbox. You can also set more complex conditions by combining them.
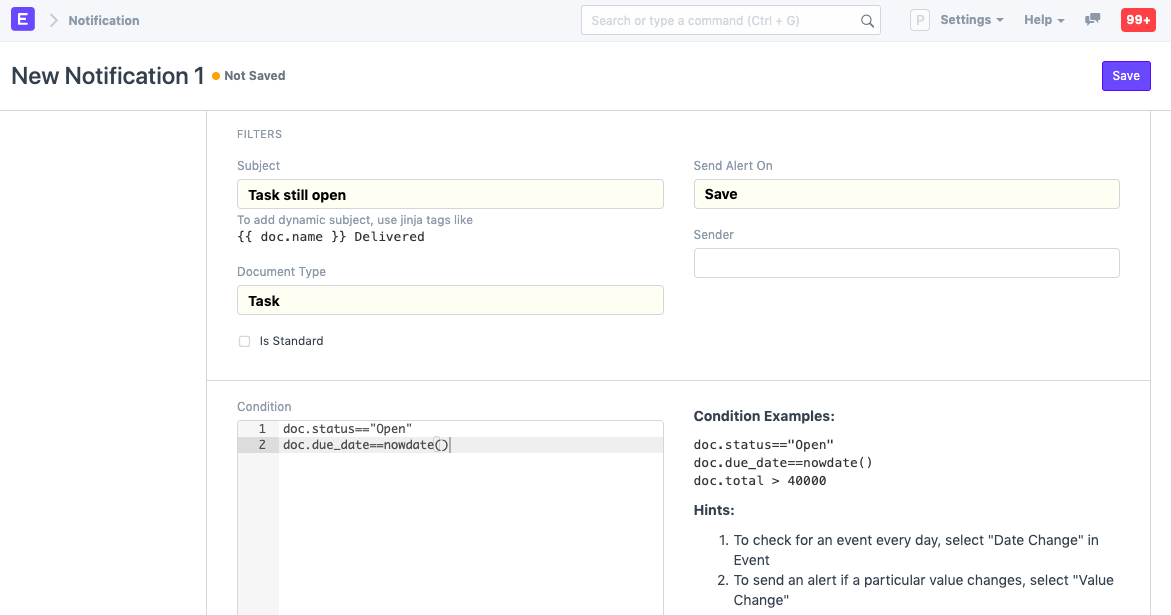
The above example will send a Notification when a Task is saved with the status "Open" and the "Expected End Date" for the Task is the date on or before the date on which it was saved on.
1.3 Setting a Message
You can use both Jinja Tags ({{ doc.[field_name] }}) and HTML tags in the message textbox.
<h3>Order Overdue</h3>

<p>Transaction {{ doc.name }} has exceeded Due Date. Please take necessary action.</p>

<!-- show last comment -->
{% if comments %}
Last comment: {{ comments[-1].comment }} by {{ comments[-1].by }}
{% endif %}

<h4>Details</h4>

<ul>
<li>Customer: {{ doc.customer }}
<li>Amount: {{ doc.total_amount }}
</ul>
1.4 Setting a Value after the Alert is Set
Sometimes to make sure that the Notification is not sent multiple times, you can define a custom property (via Customize Form) like "Notification Sent" and then set this property after the alert is sent by setting the Set Property After Alert field.
Then you can use that as a condition in the Condition rules to ensure emails are not sent multiple times
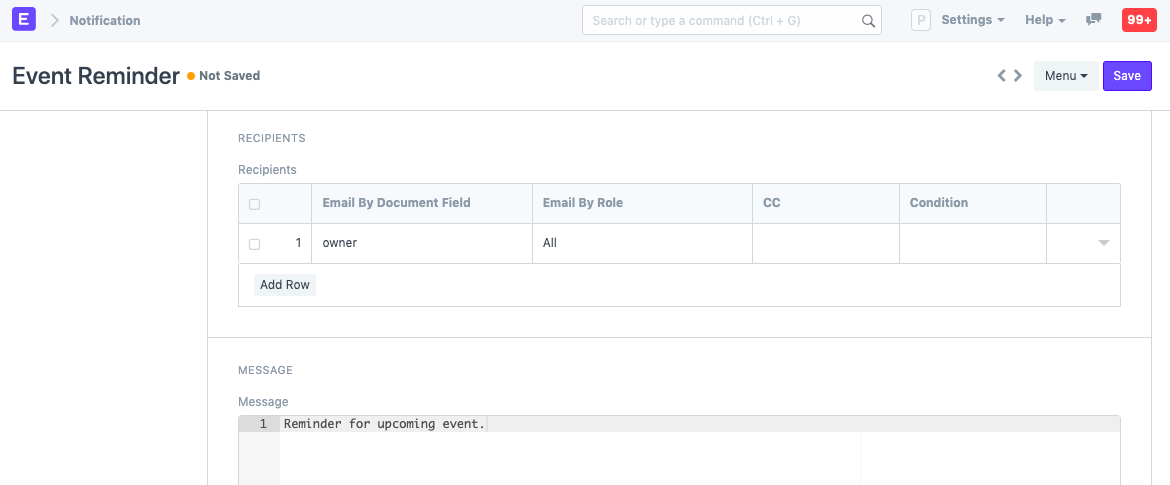
1.5 Example
Defining the Criteria
Setting the Recipients and Message
2. Slack Notifications
If you prefer to have your notifications sent to a dedicated Slack channel, you can also choose the option "Slack" in the channel options and select the appropriate Slack Webhook URL.
2.1 Slack Webhook URL
A Slack webhook URL is a URL pointing directly to a Slack channel.
To generate webhook URLs, you need to create a new Slack App:
- Go to https://api.slack.com/slack-apps.
Click on "Create a Slack App".
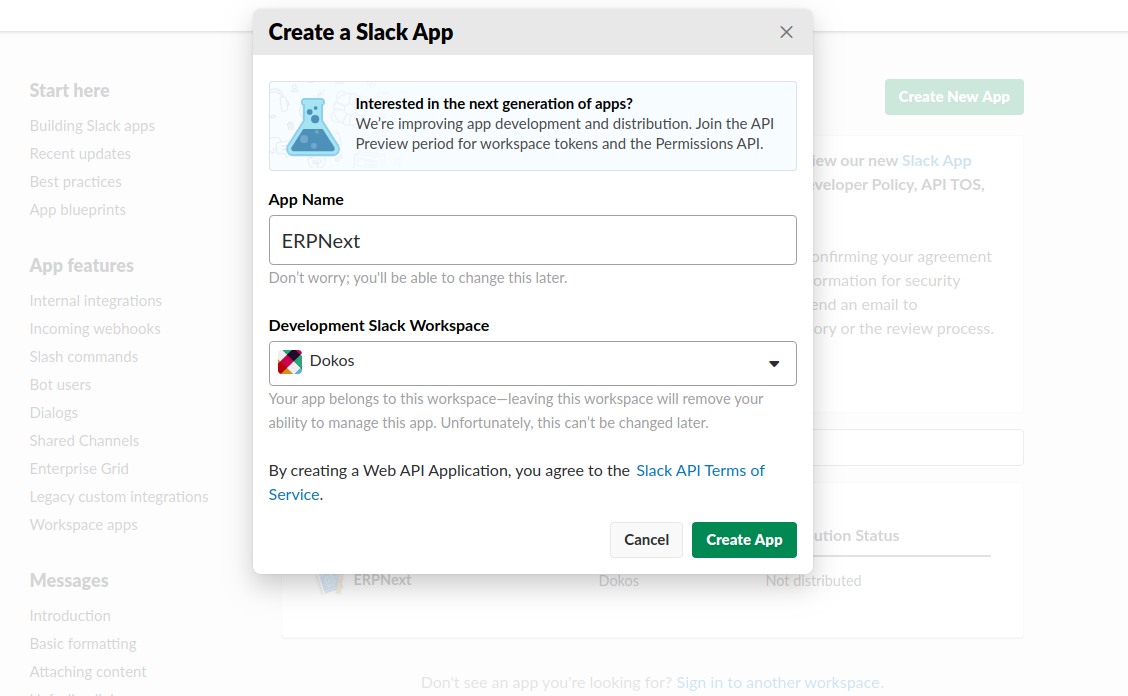
Give your App a name and choose the right workspace. Once your app is created, go to the "Incoming Webhooks" section and add a new Webhook to Workspace.
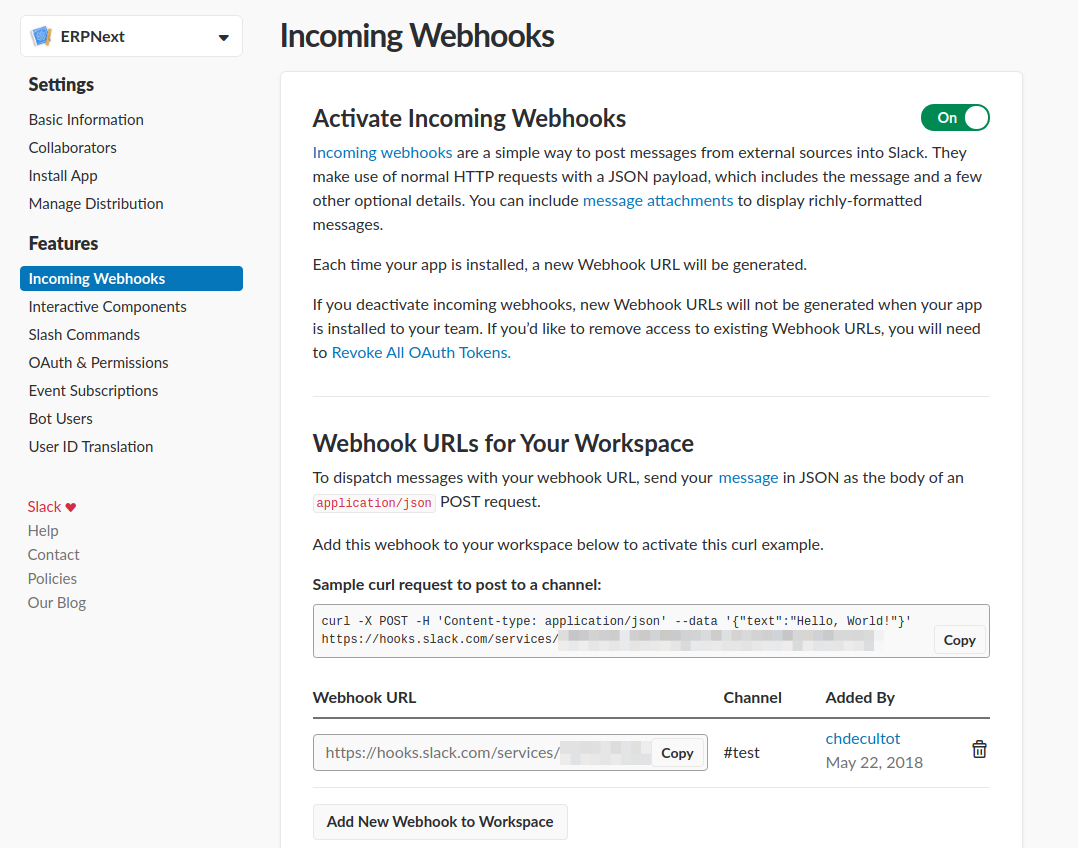
Copy the created link, go back to ERPNext and use it to create a new Slack Webhook URL in Integrations > Slack Webhook URL.

Select Slack and your Slack channel in the channel and Slack channel fields within your notification
2.2 Message Format
Unlike Email messages, Slack doesn't allow HTML formatting.
Instead, you can use markdown formatting: Slack Documentation
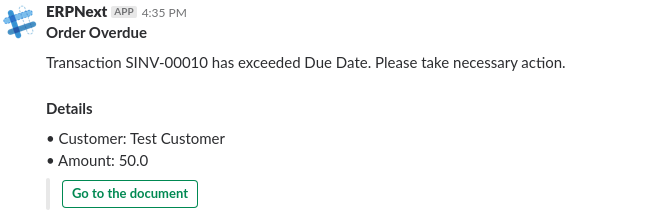
Example: Order Overdue
Transaction {{ doc.name }} has exceeded Due Date. Please take the necessary action.


{% if comments %}
Last comment: {{ comments[-1].comment }} by {{ comments[-1].by }}
{% endif %}

*Details*

• Customer: {{ doc.customer }}
• Amount: {{ doc.grand_total }}
3. System Notifications
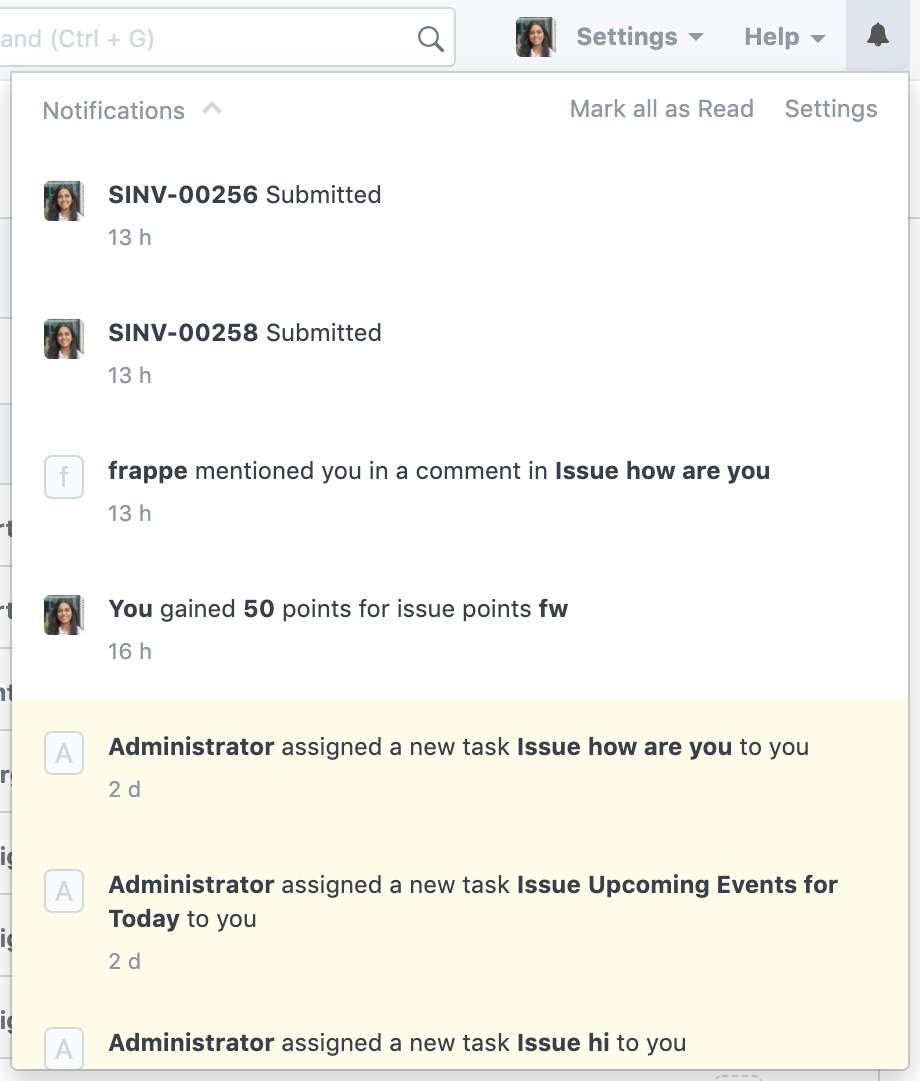
In Version 12 we introduced System notifications for Assignments, mentions, documents shared, and Energy Points. These notifications show up in the notifications dropdown on the the navigation bar's top right corner.
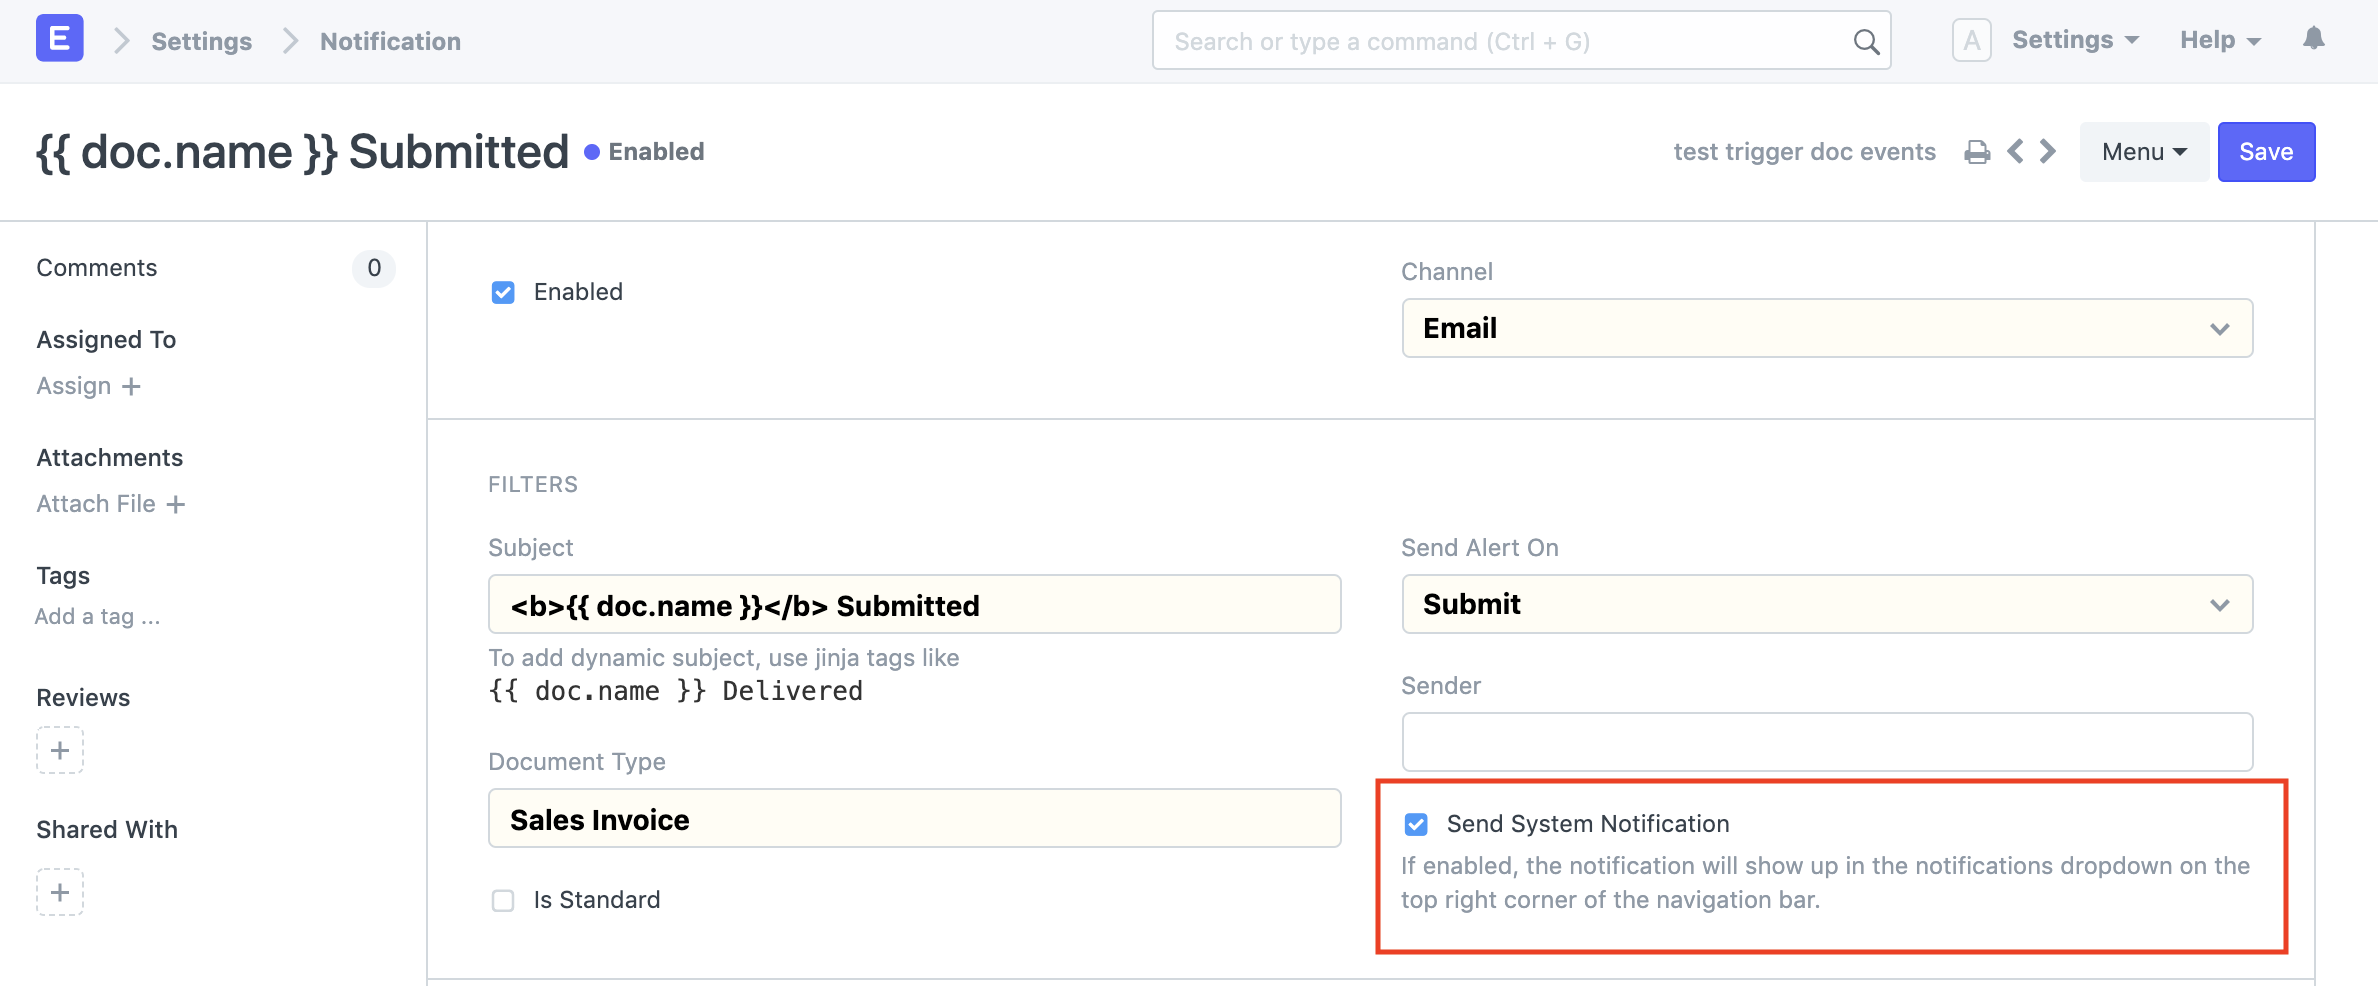
In Version 13 we have introduced an additional channel to send alerts - System Notifications:
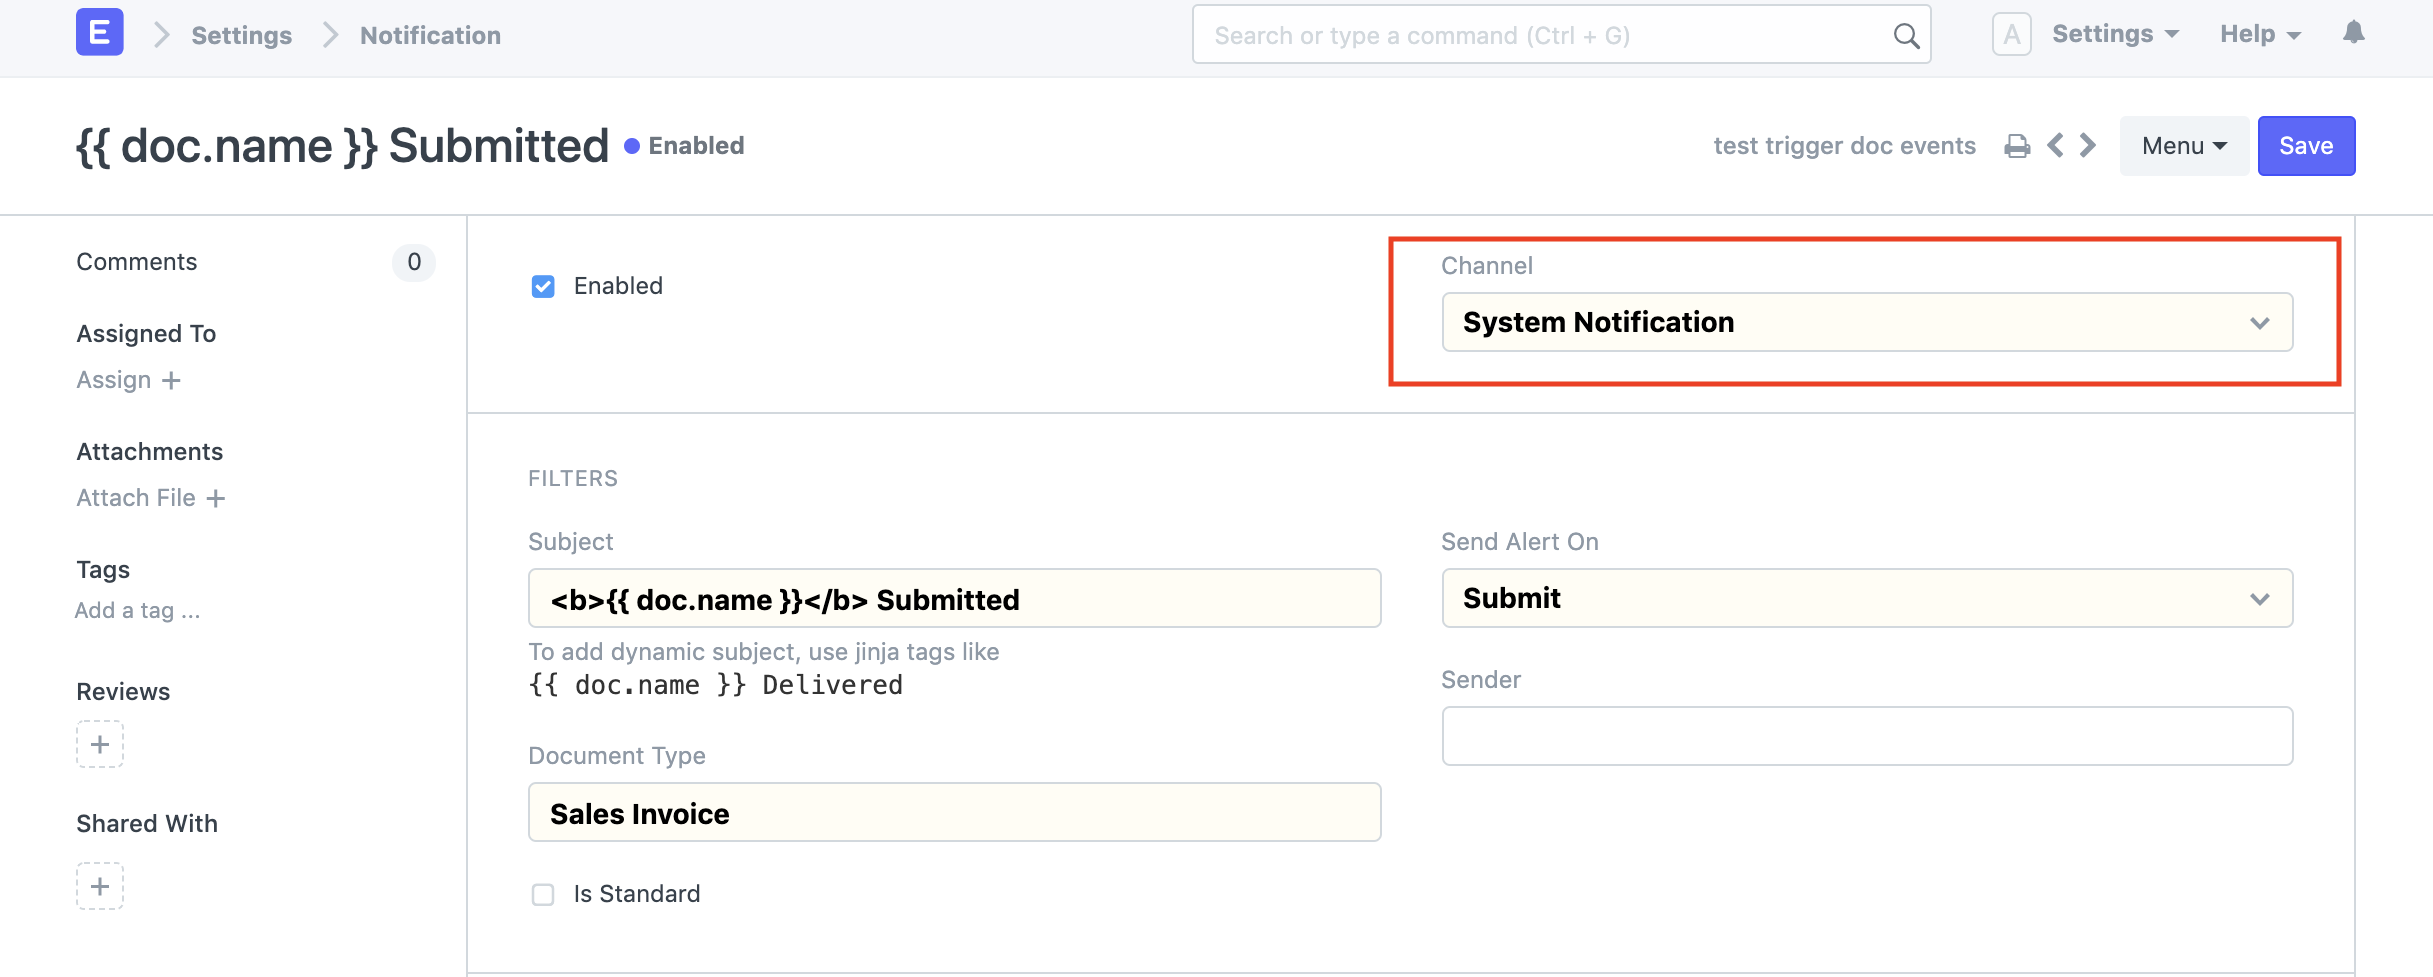
Choosing this channel will send a system notification when a notification is triggered, instead of an Email or a Slack notification.
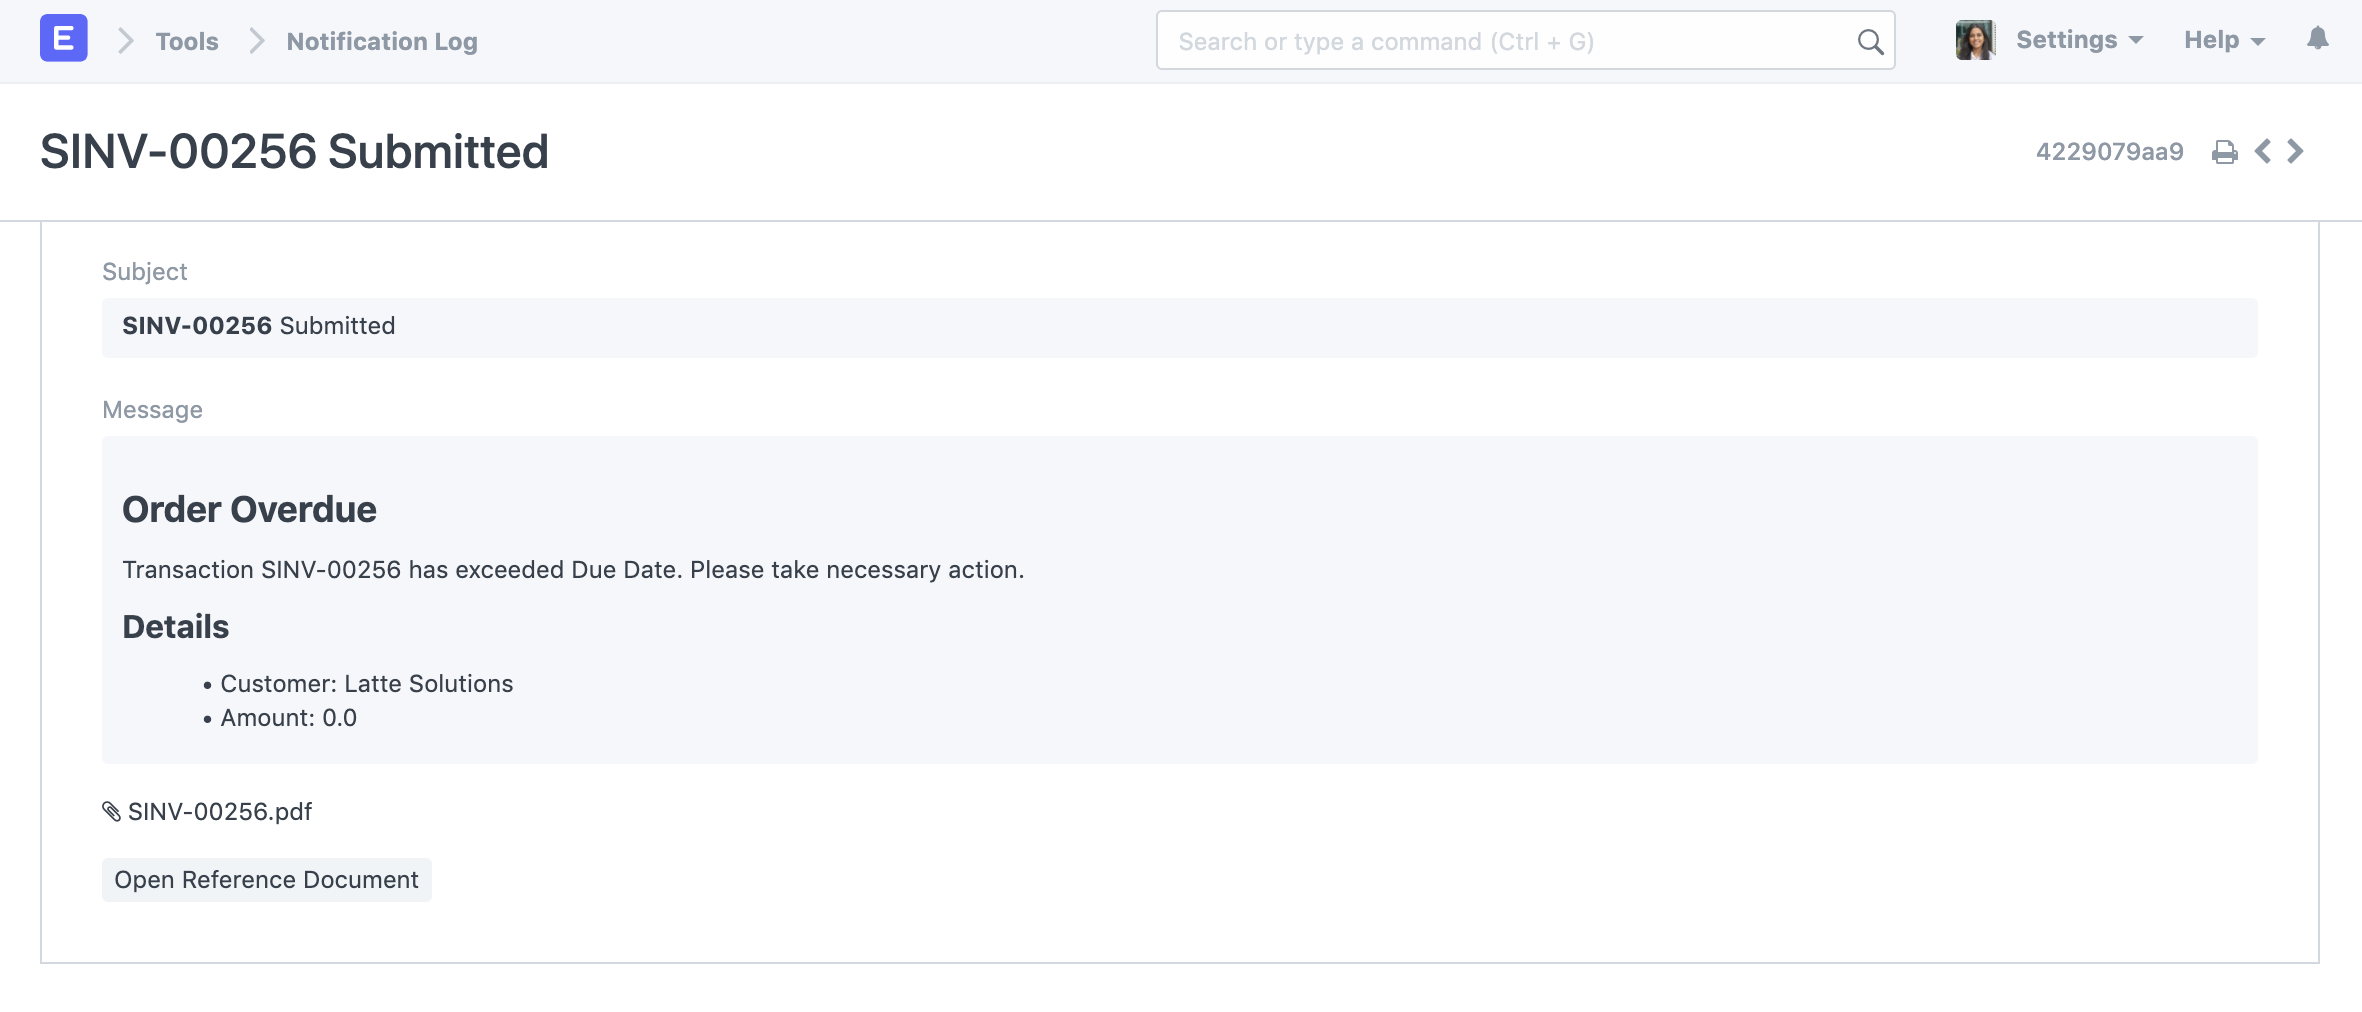
Clicking on the notification routes to the Notification Log document which contains the configured subject, message as well as the attached file, if Attach Print is set:
If Email/Slack alerts and System Notifications both are required, the main channel can be set as Email or Slack and this option can be checked: