Workflows
With workflows you can rewrite how a particular process/workflow is approved in ERPNext.
You can set multiple levels of approval for an ERPNext Workflow. To allow multiple people to submit multiple requests, for approvals by multiple users, ERPNext requires you to fill the Workflow conditions. ERPNext tracks the multiple permissions before submission.
Example of a leave application Workflow is given below:
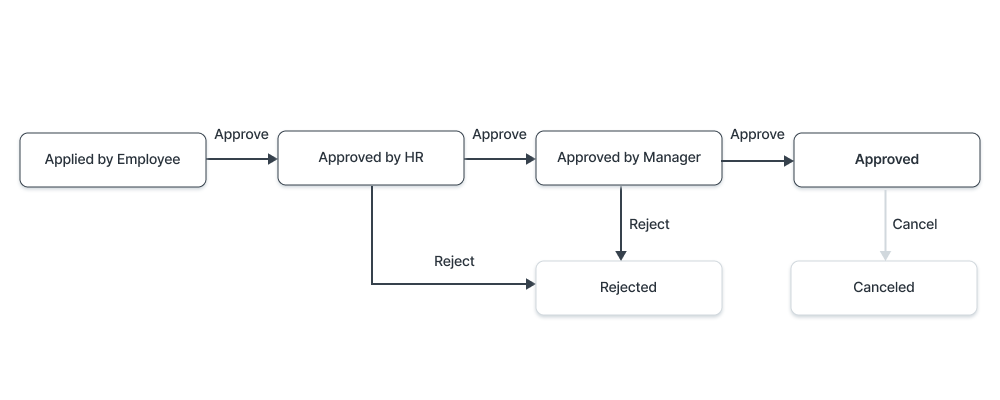
This is an example of a two level approval with cancellation. If a user applies for leave, then his request will be sent to the HR department. The HR department (HR User) will either reject or approve this request. Once this process is completed, the user's Manager (leave approver) will get an indication that the HR department has Accepted or Rejected. The Manager, who is the approving authority, will either Approve or Reject this request. Accordingly, the user will get his Approved or Rejected status.
To make a Workflow and transition rules go to:
Home > Settings > Workflow
Once a Workflow is created, you can take actions on it via Workflow Actions.
1. Prerequisites
Before creating a Workflow, it is advised to create these first:
- Workflow Actions
- Workflow States like Approved, Canceled, etc.
2. How to Create a Workflow
- Go to the Workflow list, click on New.
- Enter a name for the Workflow and select the DocType on which to be applied.
Enter the different states of the Workflow. Enter Doc Status for them, select which field to update from the Update Field column, enter what the value will be updated to under Update Value.
The Workflow States can have different colors according to the state. Eg: Green for success. Document statuses: Saved = 0, Submitted = 1, Cancelled = 3.
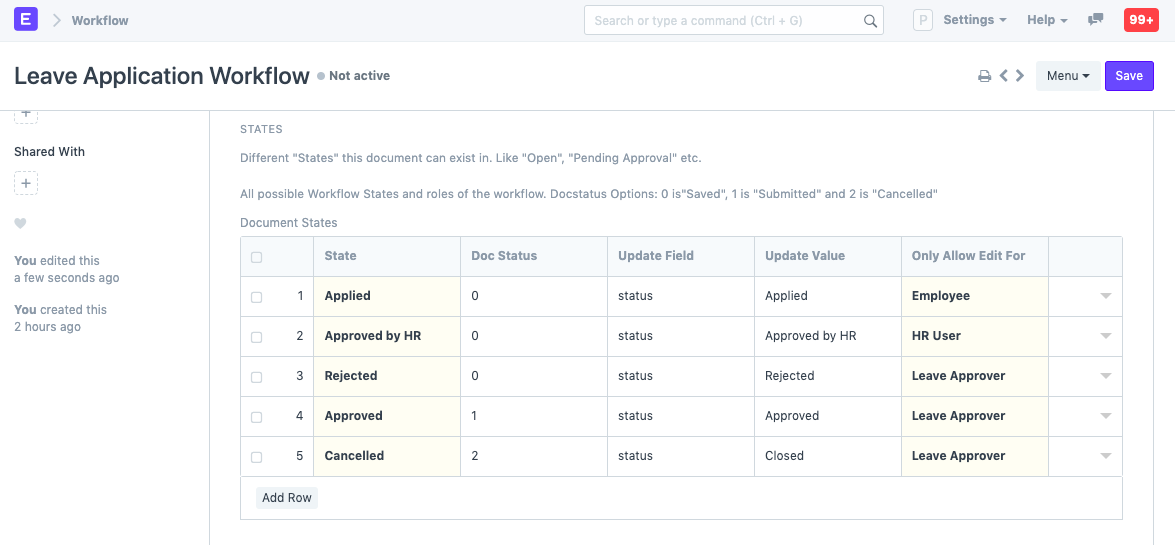
The field you select under Update Field will be updated for the document type when the State changes. Update Value is the text that appears on the field selected in Update Field. So here the status field is updated to Applied, Approved, etc.
Enter the Transition Rules.
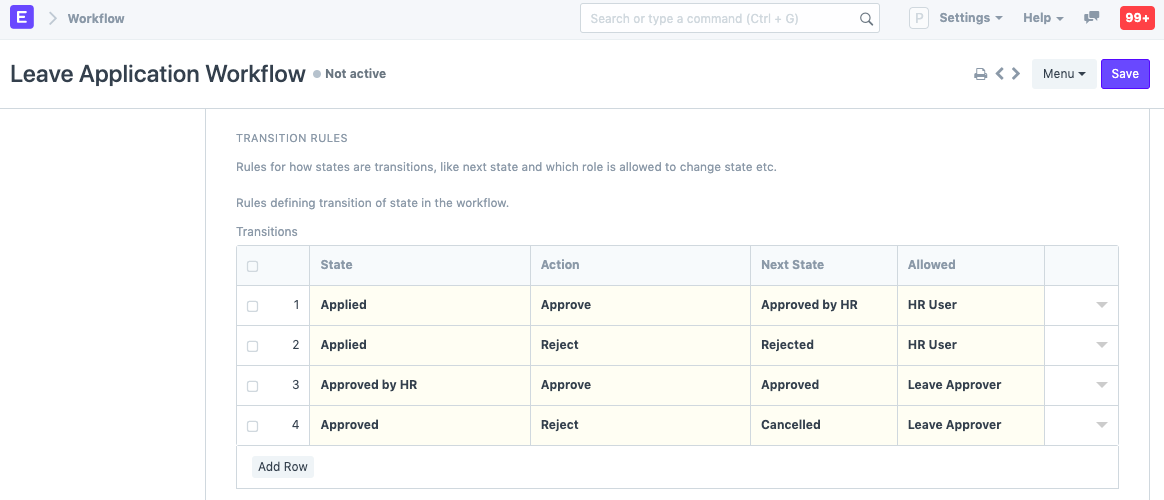
Action indicates the actions an approver can take on the leave application. Next State is the State the document type will be at when the Action is applied. So here, the State changes from Applied to Approved by HR when the Approve action is performed on it.
Under Workflow State Field, enter a name for the Custom Field that'll be added to the DocType, Leave Application in this case.
- On saving, the Custom Field will be created in the DocType.
2.2 Things to note when creating a Workflow
Creating a Workflow in ERPNext essentially overrides the regular Save and Submit workflow. Thus the document will function based on your Workflow and not based on the pre-set code workflow. Hence there might be no Submit button/option if you have not specified it in the Workflow you create.
If you don't apply a Workflow to a document, and that document is submittable, then it has the default workflow with states: Draft - Submitted - Cancelled. If you are applying a Workflow to a submittable document, then those default states should be handled by the user.
A document cannot be canceled unless it is submitted.
If you wish to give the option to cancel, you will have to write a workflow transition step that says from submitted you can cancel.
If fields under Update Field column are not updated, a new custom field will be created with the name you set in the 'Workflow State Field' field.
2.3 Other options for a Workflow
- Is Active: On ticking this, all other Workflows for the selected DocType become inactive.
- Don't Override Status: This Workflow's status will not override the status of the document (Leave Application) in the list view.
- Send Email Alerts: Emails will be sent to the user with next possible workflow actions.
3. Features
3.1 Enable/Disable Optional Workflow State
Introduced in Version 12
In States, optional Workflow state means that the state may not be a part of final approval.
E.g. states like Canceled or Rejected can be optional.
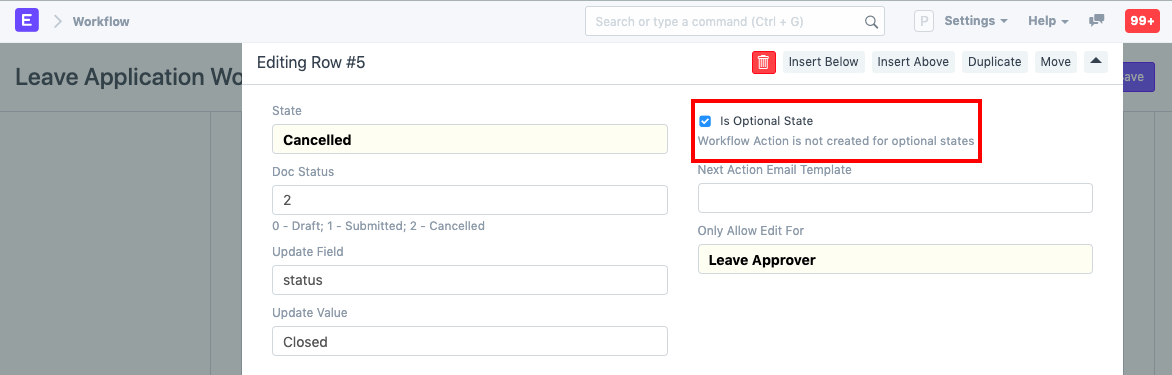
Note: Workflow Actions are not created for optional states.
3.2 Conditions
Introduced in Version 11
In Version 11, you can also add a condition for the Transition to be applicable. For example, in this case, if someone applies for a leave of more than 5 days, a particular role must approve. For this to happen in the particular transition, you can set a property for Condition under Approved by HR as:
doc.total_leave_days <= 5
Then if someone applied for leave for less than 5 days, only that particular transition will apply. Here, total_leave_days is the field name of the field 'Total Leave Days' of Leave Application. To see the field name of a field go to Menu > Customize.
This can be extended to any property of the document.
4. Example of a Leave Application Process
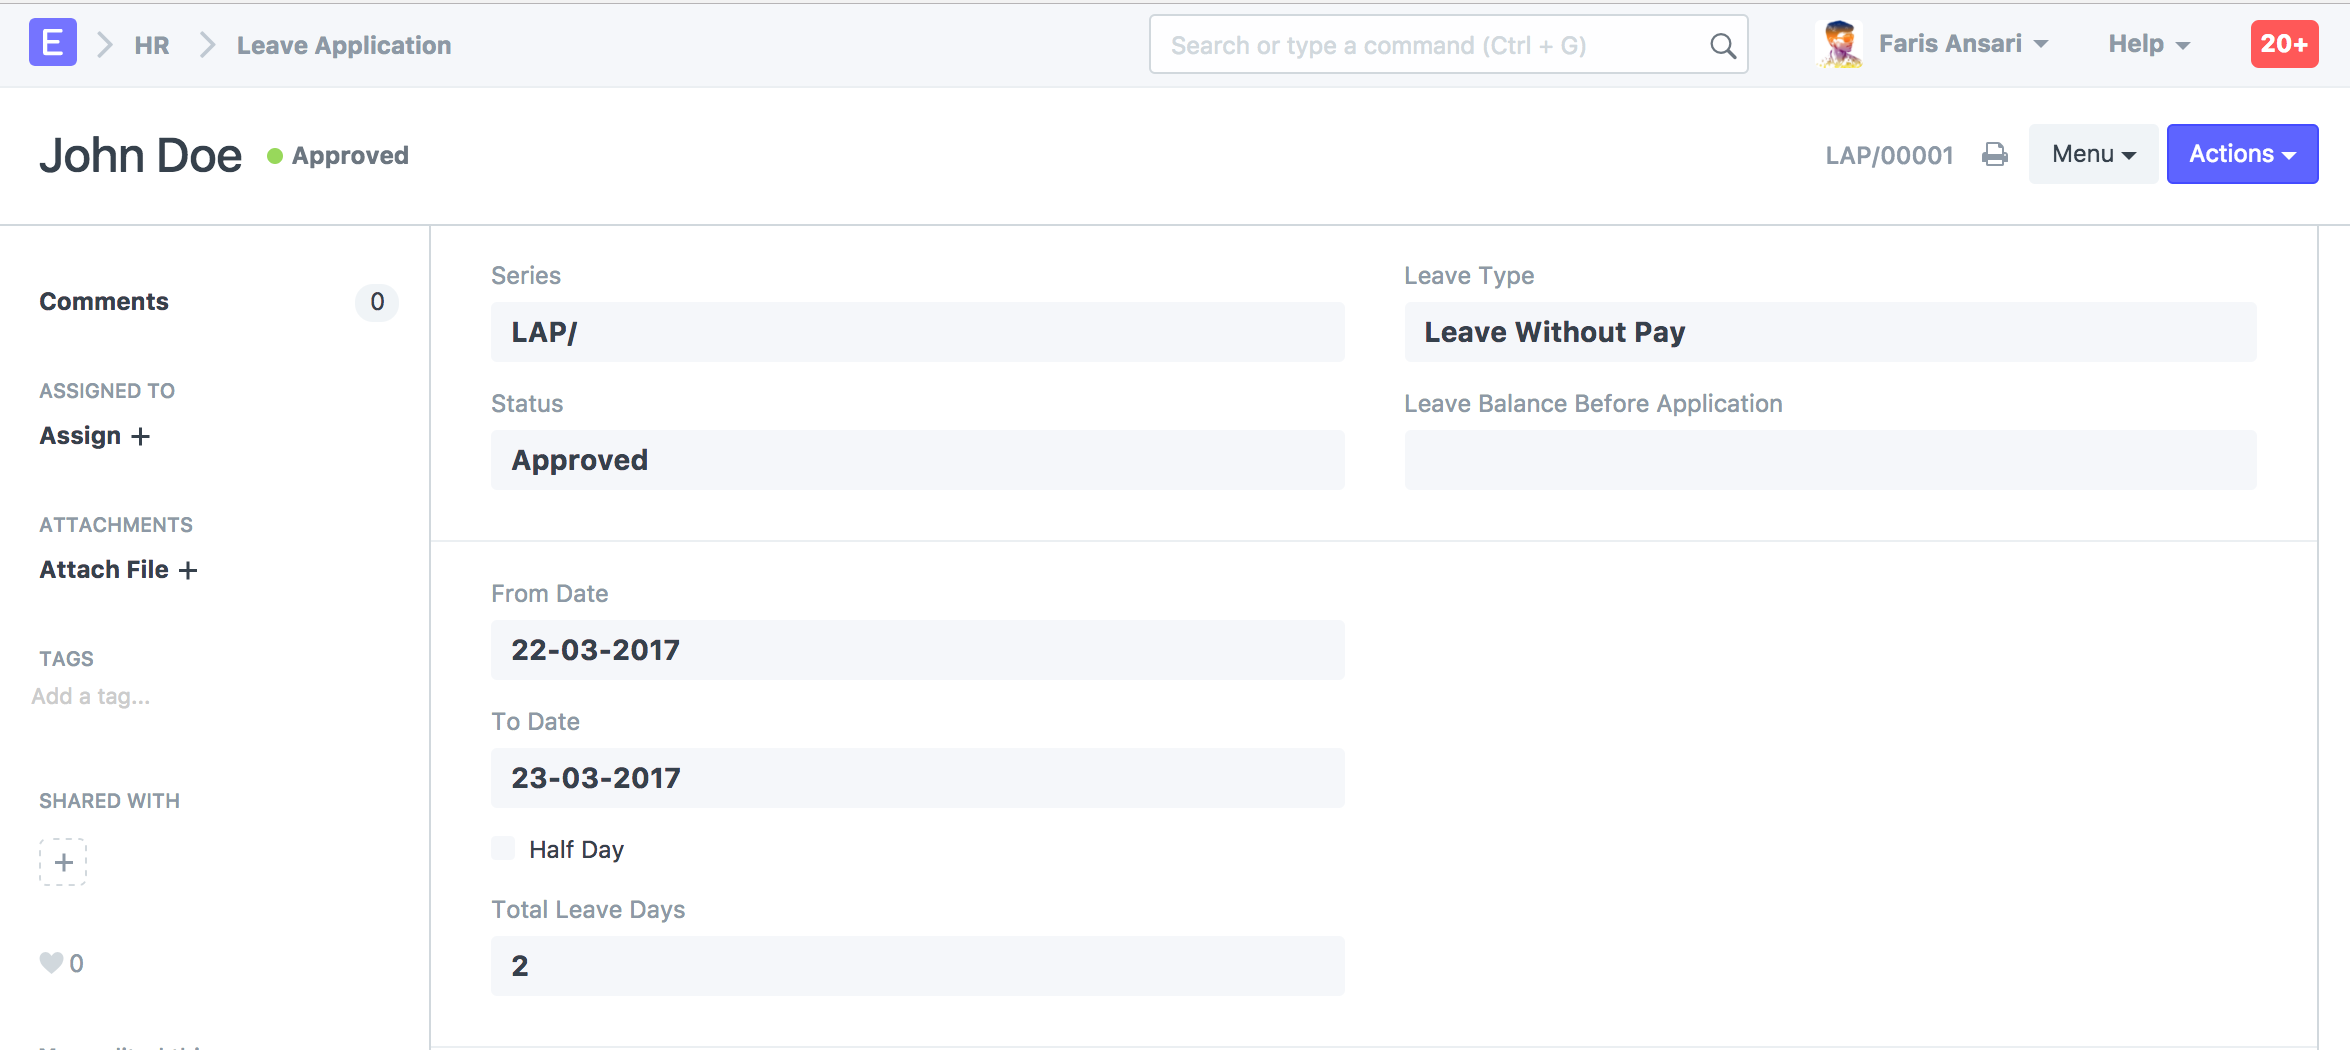
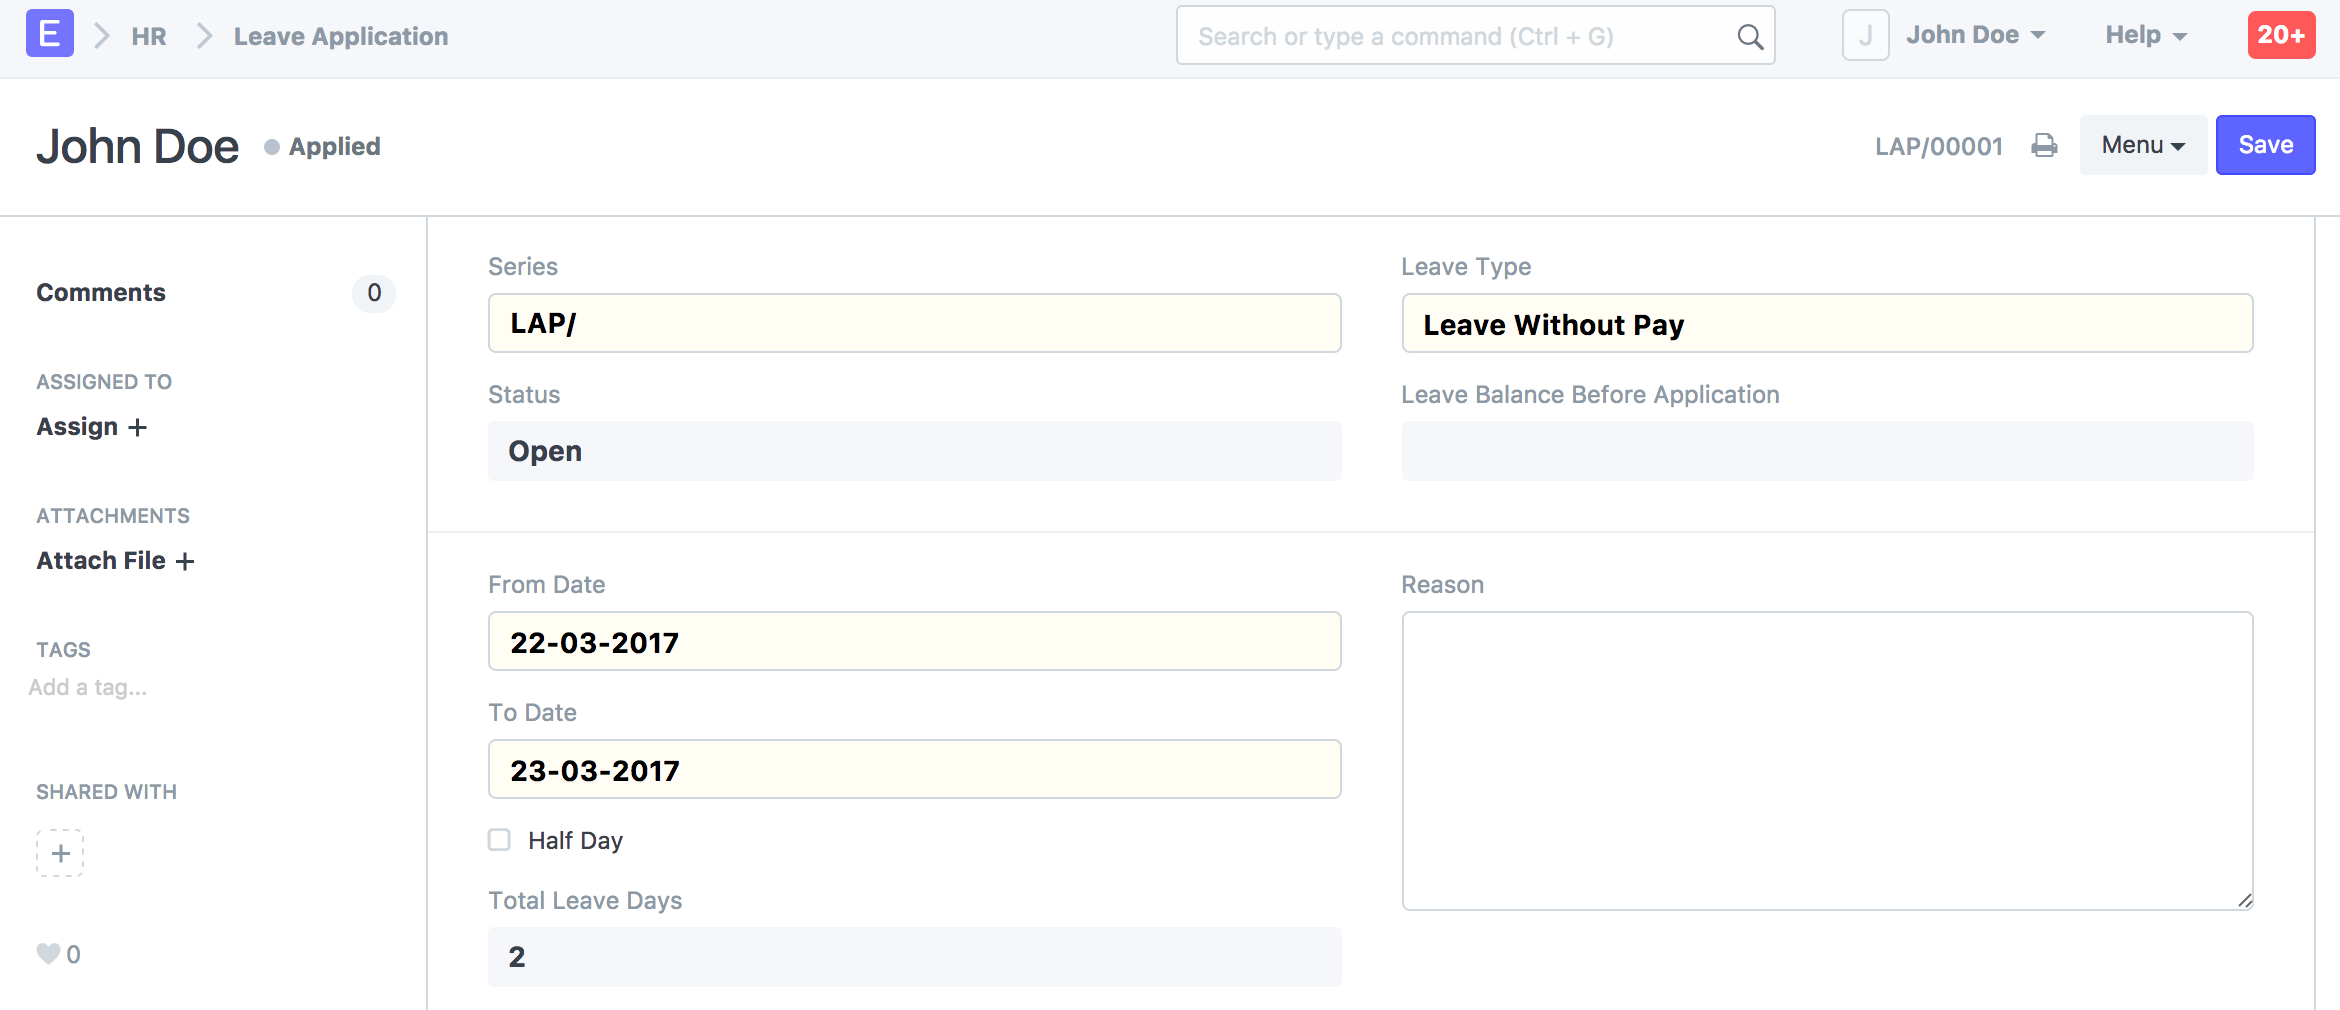
When a Leave Application is saved by Employee, the status of the document changes to "Applied":
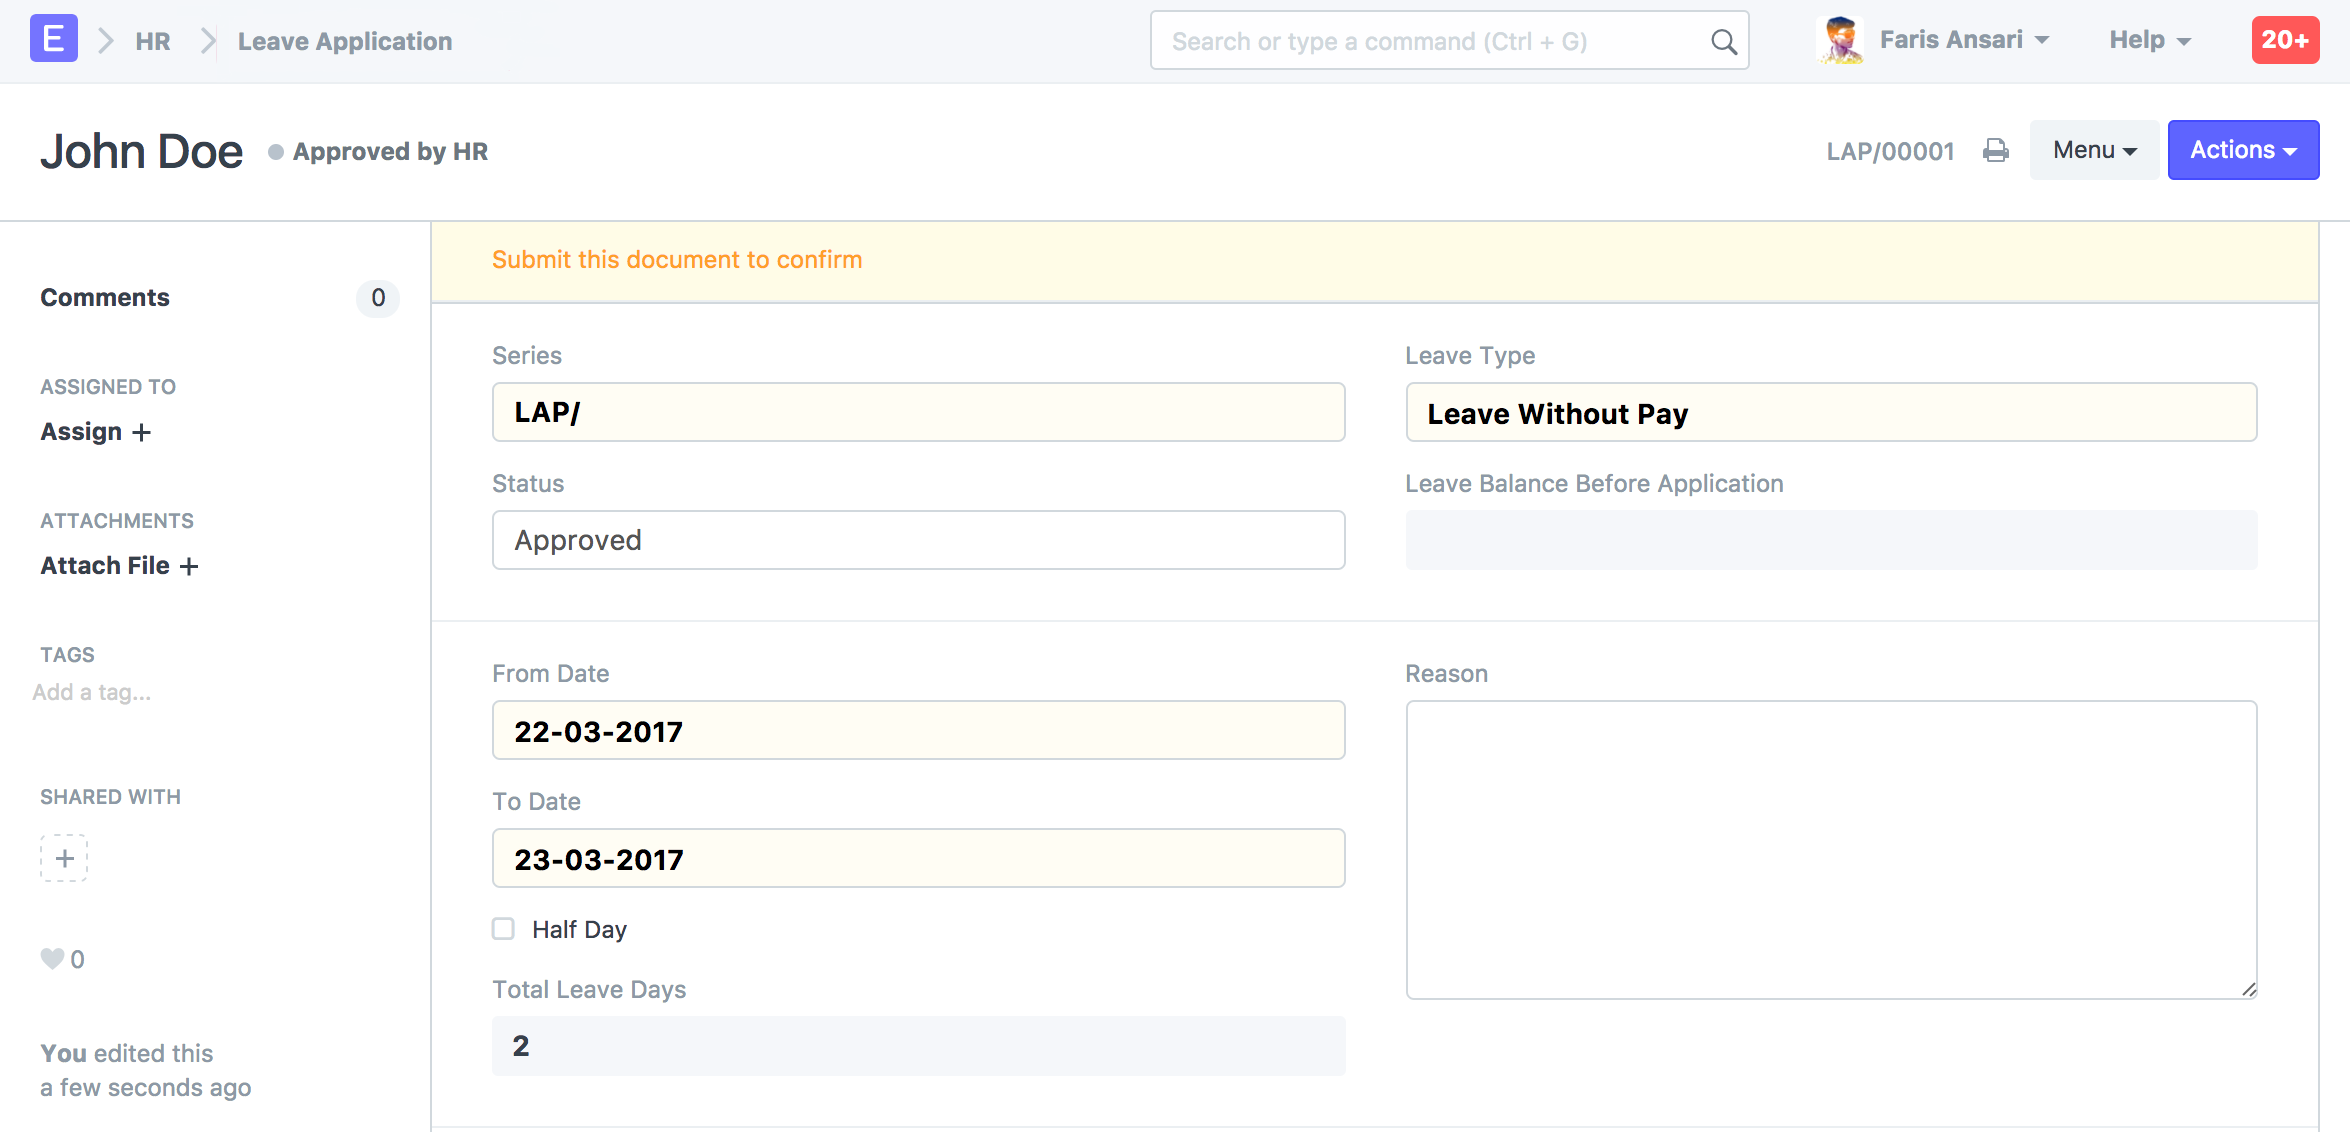
When the HR User logs in, he can either Approve or Reject. If approved the status of the document changes to "Approved by HR". However, it is yet to be approved by Leave Approver.
When the Leave Approver opens the Leave Application page, he can finally "Approve" or "Reject" the Leave Application.